Simple Report
The Simple Report feature allows you to quickly generate professional reports and offers using predefined templates. This tool provides a streamlined interface for creating comprehensive documentation of your CCTV or low-voltage system projects, including overview pages, camera details, device information, cable summaries, IP addressing, and pricing. The Simple Report uses templates with customizable branding options, making it ideal for creating client-ready proposals and documentation.
When to use this
- When you need to quickly create professional reports and offers for clients
- When you want to use predefined templates instead of customizing every detail
- When you need to generate comprehensive project documentation with minimal setup
- When you want to include branding (logo, colors) in your reports
- When you need to export reports as PDF or print them directly
Opening Simple Report
To access the Simple Report:
- Click on the Report Creation menu in the right toolbar.
- Select Simple Report from the dropdown menu.
- The Simple Report interface will open in full-screen mode.
If this is your first time using Simple Report or no template is configured, a setup wizard will guide you through the initial configuration.
Report setup wizard
The Report Setup Wizard appears automatically when you first open Simple Report or when no template is configured. It guides you through three steps:
Step 1: Template selection
Choose a report template that matches your needs.
If you have previously saved presets, a "Or start from a preset" section appears above the template dropdown. Clicking a preset card applies all saved settings (template, branding, page types, PPM distances, text overrides) instantly and skips the remaining wizard steps — the report is generated immediately. See Report Presets for details.
Step 2: Page types selection
Select which types of pages you want to include in your report:
- Front Page – Cover page with project information
- Overview – Image of the entire plan with cameras grouped by colors and a list of unique camera types displayed
- Overview Simple – Image of the entire plan with camera indexes instead of camera icons
- Camera Detail – Detailed information for each camera
- Channel Detail – Individual channel details for cameras
- Camera Photos – Installation photos and position views
- Device List – List of all devices and cameras in the project
- Pricing Page – Page with offer and calculation
- BOM Page – Bill of Materials
- Connection List – List of all connections in the project
- Cable Summary – Summary of all cable connections
Enable or disable page types using the checkboxes. You can change these settings later in the report settings.
Step 3: Project details
Enter basic project information:
- Project Name – The name of your project
- Subtitle – Additional project identifier (e.g., "Project Number: 1234")
- Customer – Customer or client name
- Generated On – Date when the report is generated (defaults to today)
After completing all three steps, click Finish to generate your report.
Toolbar controls
The toolbar at the top provides essential controls for navigating and managing your report:
Page navigation
- Previous/Next buttons – Navigate between pages
- Page number input – Type a page number to jump directly to that page
- Page list dropdown – View all pages with their titles and types, then click to jump to any page
Zoom and view
- Zoom in/out – Adjust the zoom level (25% to 200%)
- Zoom percentage – Current zoom level is displayed
- Fit to width – Reset zoom to 100% and center the view
- Mouse wheel zoom – Hold Ctrl (or Cmd on Mac) and scroll to zoom
Template selection
- Template dropdown – Switch between available templates
- Templates can be changed at any time, which will regenerate all pages
Settings
- Settings button – Opens a dialog to enable/disable page types
- Adjust more settings – Opens the detailed settings sidebar
Presets
- Presets button (bookmark icon) – Opens a dropdown to save, apply, or delete your report configuration presets
- A number badge on the button shows how many presets are currently saved (max 3)
- See Report Presets for full details
Export actions
- Generate PDF – Export the report as a PDF file
- Print – Open the browser print dialog
- Close – Exit Simple Report and return to the main application
INFO
For reports with more than 100 pages, you'll be prompted to select a page range (maximum 100 pages per export/print) due to browser limitations.
Viewing and navigating pages
The main content area displays your report pages:
- Page preview – Each page is shown as it will appear in the final PDF
- Page numbers – Displayed at the bottom-right of each page
- Scroll navigation – Scroll through pages vertically
Keyboard shortcuts
- Arrow Left – Go to previous page
- Arrow Right – Go to next page
- Escape – Close dropdowns and dialogs
Dragging and panning
When zoomed in (above 100%):
- Click and drag – Pan around the zoomed view
- Cursor changes – Shows a "grab" cursor when you can drag
Page types and content
Simple Report generates different types of pages based on your project data:
Front page
The cover page includes:
- Project name and subtitle
- Customer information
- Generation date
- Company branding (logo, colors)
Overview
Shows the project layout with:
- Camera positions and FOVs
- Device locations
- Floor plans (for multi-floor projects)
- Overview can be generated for each floor separately
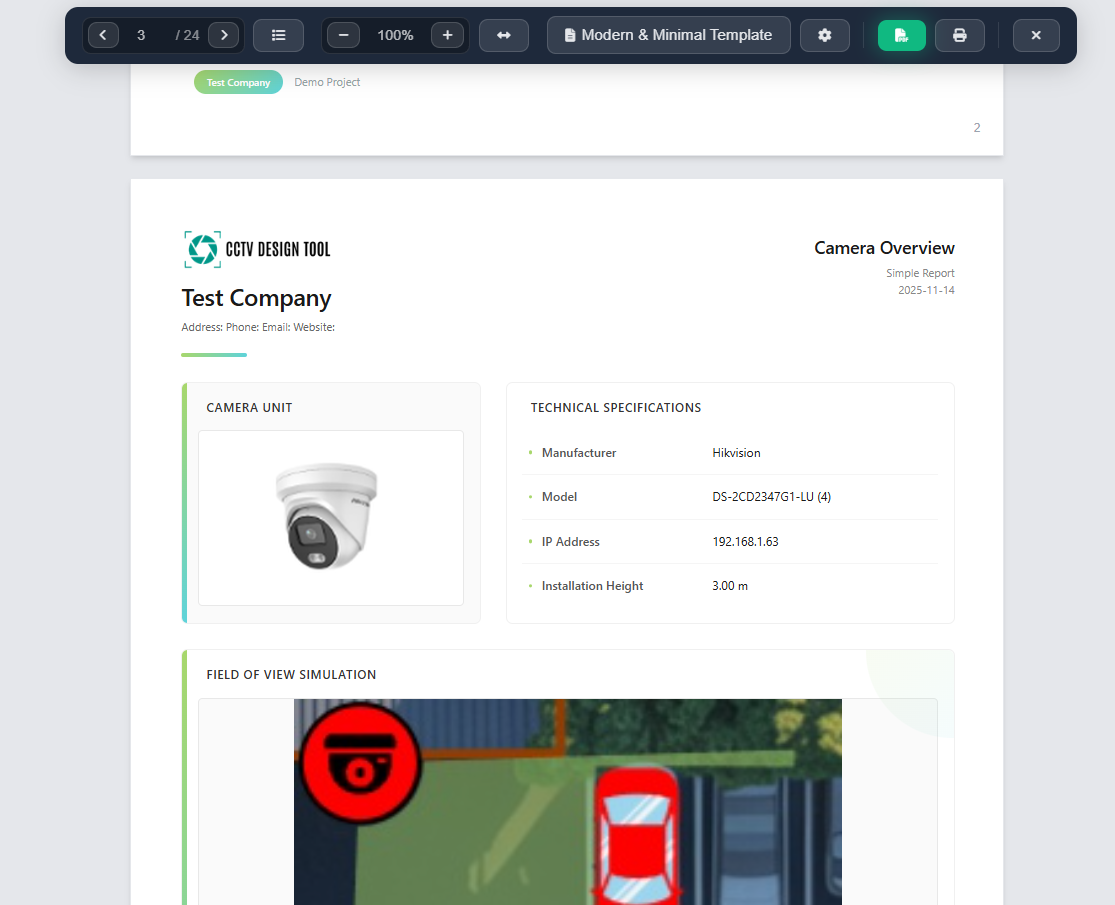
Camera detail
Detailed pages for each camera including:
- Camera specifications (manufacturer, model, resolution)
- Channel information (FOV angles, zoom ranges)
- IP address
- Installation height
- FOV images and angle charts
- PPM (Pixel Per Meter) images at configurable distances (default: 5 m, 10 m, 20 m)
Device detail
Pages for each network device showing:
- Device type and specifications
- Manufacturer and model
- IP address
- Installation height
Channel detail
Individual pages for each camera channel (if enabled) with:
- Channel-specific FOV information
- Angle charts
- PPM images
Camera photos
Pages showing:
- Camera installation photos (before/after)
- Camera position on the plan
- NVR view screenshots (if available)
Cables summary
Summary of all connections:
- Cable types and lengths
- Connection counts
- Total cable requirements
IP addressing
List of all IP addresses assigned to:
- Cameras
- Network devices
- Organized by device type
Pricing
Bill of Materials (BOM) with:
- Product listings with quantities
- Unit prices and totals
- Tax calculations
- Grand total
Settings and customization
The Settings sidebar provides detailed customization options:
Branding settings
Configure your company branding (Premium/Enterprise only):
- Company Name – Your company name
- Company Details – Address, phone, email, website
- Logo – Upload your company logo (PNG or JPG, max 1MB)
- Primary Color – Main brand color
- Secondary Color – Accent brand color
- Save as Default – Save branding settings for future reports
- Reset to Default – Restore default branding
Project details
Edit project information:
- Project Name
- Subtitle
- Customer
- Generated On
Page type settings
Each page type that has customizable settings appears as an expandable section:
- Expand/Collapse – Click the chevron icon to expand settings
- Custom fields – Each page type may have specific settings (text fields, dates, toggles)
- Settings are saved – Changes apply when you click "Apply Changes"
PPM distances
Configure the three distances used for PPM (Pixel Per Meter) preview images on camera detail and channel detail pages:
- Distance 1 / 2 / 3 – Each field accepts a value in the project's current unit (meters or feet). Defaults are 5 m, 10 m, and 20 m.
- Values are stored with the project and restored automatically on next open.
- Changing distances marks the report as having unapplied changes; click Apply Changes to regenerate the PPM images with the new distances.
Applying changes
After making any settings changes, an amber banner appears at the top of the sidebar indicating there are unapplied changes. You can apply them in two ways:
- Click Apply Changes directly in the banner (available as soon as a change is detected).
- Click Apply Changes at the bottom of the settings sidebar.
The report will regenerate with your new settings and the sidebar will close automatically.
Enabling and disabling pages
You can quickly enable or disable page types without opening the full settings:
- Click the Settings button (gear icon) in the toolbar
- A dialog appears with checkboxes for each page type
- Toggle page types on or off
- Click Adjust More Settings to access detailed customization
Changes take effect immediately when you apply them.
Exporting and printing
Generating PDF
- Click the Generate PDF button in the toolbar
- For reports with more than 100 pages, a dialog will appear:
- Enter the page range (From and To)
- Maximum 100 pages per export
- Click Export PDF to proceed
- The PDF will be generated and downloaded automatically
- File name is based on your project name
Printing
- Click the Print button in the toolbar
- For reports with more than 100 pages, select a page range (same as PDF)
- The browser print dialog will open
- Configure print settings (printer, pages, layout)
- Print as normal
Page range limitations
Due to browser limitations:
- Maximum 100 pages per PDF export or print operation
- For larger reports, export in multiple batches
- The system automatically validates page ranges
Report Presets
Presets let you save your entire report configuration — template choice, branding, enabled page types, PPM distances, and text overrides — and reuse it across multiple projects with a single click. They are stored in your browser's local storage, so no account action or internet connection is required.
INFO
Presets are stored per browser. They are not synced across devices or browsers.
What is saved in a preset
| Setting | Included |
|---|---|
| Template | ✓ |
| Branding (company name, logo, colors, details) | ✓ |
| Enabled page types | ✓ |
| Per-page settings (user variables) | ✓ |
| PPM distances | ✓ |
| Text overrides | ✓ |
| Project-specific data (customer, title, subtitle) | ✗ |
Saving a preset
- Configure your report as desired (template, branding, page types, PPM distances, etc.)
- Click the bookmark icon in the toolbar
- In the dropdown, click "Save current settings as preset"
- Enter a name for the preset (defaults to the current template name)
- Press Enter or click Save
- A confirmation toast confirms the preset was saved
You can save up to 3 presets. If all 3 slots are full, the "Save" option is disabled — delete an existing preset first to free up a slot.
Applying a preset (existing project)
- Open Simple Report on any project
- Click the bookmark icon in the toolbar
- Click the name of the preset you want to apply
- All saved settings are applied immediately — the report regenerates automatically
- A toast confirms which preset was applied
Applying a preset (new project via wizard)
When opening Simple Report on a project with no report configured yet, the setup wizard starts. On Step 1, if you have saved presets, a "Or start from a preset" section appears above the template dropdown:
- Click the preset card you want to use
- All settings are applied instantly — the wizard closes and the report is generated
- No need to go through Steps 2 and 3
Deleting a preset
- Click the bookmark icon in the toolbar
- Click the trash icon next to the preset you want to delete
- A toast confirms the preset was removed
Report generation process
When you first open Simple Report or apply changes:
- Data preparation – The system gathers all project data (cameras, devices, connections, etc.)
- Image generation – Overview images, FOV images, and other visuals are generated
- Page creation – Pages are created based on enabled page types
- Progress tracking – A progress bar shows generation status with estimated time remaining
The generation process may take some time for large projects with many cameras and devices. You can see the progress and estimated completion time.
Tips
- Start with the wizard to configure your first report—it guides you through all essential settings
- Use the page list dropdown to quickly navigate to specific sections of your report
- Adjust zoom level to review details or get an overview of the entire page layout
- Customize branding early to ensure all pages use your company colors and logo
- For large projects, consider disabling page types you don't need to reduce report size
- Use the keyboard shortcuts (Arrow keys) for faster page navigation
- Preview your report before exporting to ensure all information is correct
- Save your branding settings as defaults to speed up future report creation
- For reports over 100 pages, plan your page range exports in advance
- The Simple Report automatically includes all relevant project data—no manual data entry required
- Check project details (customer name, project name) before generating the final PDF
- Use the settings sidebar to fine-tune page-specific content and appearance
- The amber unapplied changes banner at the top of the sidebar is a quick reminder to apply your edits — you can click its button without scrolling to the bottom
- Adjust the three PPM distances in the settings sidebar to match real-world inspection distances relevant to your project (e.g., doorway width, corridor length)
- Use Presets to save your standard company configuration (branding, preferred template, page types) once and apply it to every new project in one click — no more repeating the same setup
- Save up to 3 presets for different report styles (e.g., "Full Offer", "Quick Overview", "Enterprise Branding")