Connection Manager
The Connection Manager is a comprehensive tool for managing all connections, IP addresses, and network configurations in your project. It provides three main functions: viewing and managing connections with detailed information, assigning and editing IP addresses for all devices and cameras, and batch connecting multiple devices at once. This is essential for network planning, IP address management, and efficient connection setup in large projects.
When to use this
- When you need to view and manage all connections in your project in a structured table format
- When you want to assign or edit IP addresses for multiple devices and cameras at once
- When you need to change connection types for existing connections
- When you want to export connection lists or IP address lists for documentation
- When you need to batch connect multiple devices to a single source device
Opening the Connection Manager
The Connection Manager can be accessed in several ways:
- From device/camera sidebar – Click the Connection Manager button in the Network tab of a device or camera sidebar
- From context menu – Right-click on a device or camera and select Connect with multiple devices (Connection Manager)
- From toolbar – Access through the Tools menu in the left toolbar
The Connection Manager opens as a full-screen modal with three tabs: Connections Overview, IP Addressation, and Batch Connect.
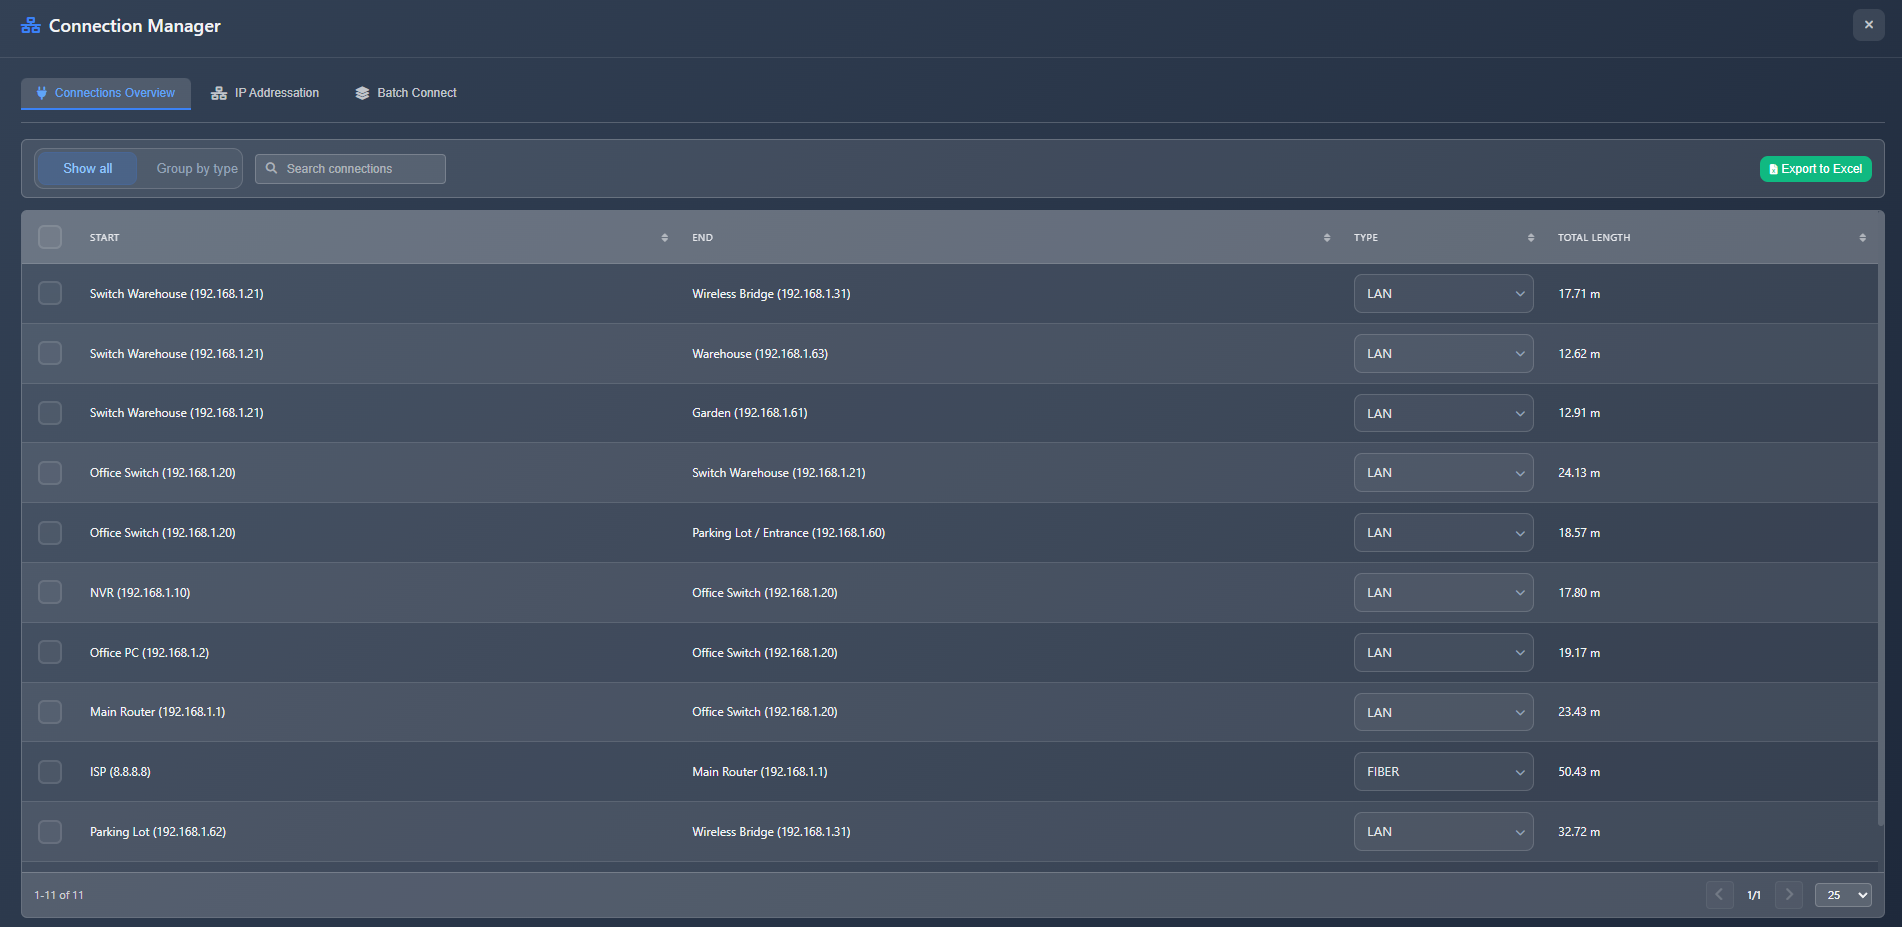
Connections Overview tab
The Connections Overview tab displays all connections in your project in a searchable, sortable table format.
View modes
You can switch between two view modes:
- Show All – Individual view showing each connection as a separate row with detailed information
- Group by Type – Grouped view showing connections aggregated by cable/connection type with total counts and lengths
Individual view
In individual view, each connection is displayed with:
- Checkbox – Select individual connections for bulk operations
- Start – The source device or camera name
- End – The destination device or camera name
- Type – Connection type dropdown (LAN, WIFI, WAN, FIBER, etc.) that you can change
- Total Length – Calculated cable length for the connection
Grouped view
In grouped view, connections are aggregated by type showing:
- Type – Connection type badge
- Count – Number of connections of this type
- Total Length – Combined length of all connections of this type
Connection operations
- Select All – Checkbox in the header to select/deselect all visible connections
- Delete Selected – Button to delete multiple selected connections at once (only visible when connections are selected)
- Change Connection Type – Use the dropdown in the Type column to change the connection type for any individual connection
- Search – Search connections by start device, end device, or connection type
- Sort – Click column headers to sort by any column
- Pagination – Navigate through large lists of connections
Exporting connections
Click the Export to Excel button to export the connection list as a CSV file. The export includes:
- Connection type
- Start device
- End device
- Total length
- Count (in grouped view)
IP Addressation tab
The IP Addressation tab provides a centralized interface for managing IP addresses for all devices and cameras in your project.
Device list
The tab displays all devices and cameras in a searchable table with:
- Name – Device or camera name (display name if set, otherwise manufacturer and model)
- Type – Device type badge (Camera or specific device type)
- IP Address – Editable IP address field
Assigning IP addresses
To assign or edit an IP address:
- Locate the device in the table (use search if needed)
- Click in the IP address field for that device
- Enter the IP address
- The system validates the IP address format in real-time
IP address validation
The system automatically validates IP addresses:
- Format validation – Checks that the IP address matches the standard format (xxx.xxx.xxx.xxx)
- Duplicate detection – Warns if the IP address is already assigned to another device
- Error display – Invalid or duplicate IP addresses are highlighted in red with an error message
Exporting IP addresses
Click the Export to Excel button to export the IP address list as a CSV file. The export includes:
- Device name
- Device type
- IP address
This is useful for creating IP address documentation or sharing with installation teams.
Batch Connect tab
The Batch Connect tab allows you to connect multiple devices or cameras to a single source device at once, which is much faster than creating connections individually.
Using batch connect
- Select the source device or camera you want to connect from
- The Batch Connect interface will show all available target devices
- Select multiple target devices
- Choose the connection type
- Click to create all connections at once
INFO
For detailed information about batch connecting, refer to the Creating Connections guide.
Tips
- Use the grouped view in Connections Overview to quickly see total cable lengths by type for procurement
- Search functionality helps you quickly find specific connections or devices in large projects
- Change connection types directly in the table without needing to delete and recreate connections
- Export connection lists regularly to keep documentation up to date
- Use IP Addressation tab to ensure all devices have unique, valid IP addresses before installation
- The IP address validation helps prevent configuration errors that could cause network issues
- Export IP address lists to share with installation teams or include in project documentation
- Use batch connect when setting up multiple cameras connected to a single NVR or switch
- Select multiple connections and delete them at once to quickly clean up your project
- Sort connections by length to identify the longest cable runs that may need special consideration