Working With FOV
Field of View (FOV) represents the area that a camera can see and monitor. Understanding how to manipulate and configure FOV is essential for accurate camera placement and coverage planning. You can adjust FOV by dragging anchors, changing settings in the camera sidebar, and using various display options to visualize camera coverage effectively.
When to use this
- When you need to adjust camera viewing angles and coverage areas
- When positioning cameras to ensure proper coverage of critical areas
- When working with varifocal cameras and need to adjust zoom levels
- When you want to visualize analytics ranges or PTZ coverage areas
- When you need to optimize camera placement for maximum coverage efficiency
Selecting a camera to view FOV
To manipulate a camera's FOV, first select the camera by clicking on it. Once selected, anchors will appear on all FOV channels of that camera, allowing you to adjust the field of view.
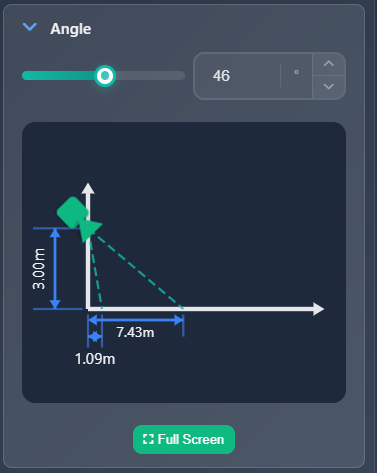
Adjusting FOV position and mounting angle
The main FOV anchor allows you to adjust both the rotation and mounting angle of the camera:
- Click and hold the anchor – Drag it around the camera to rotate the FOV (change rotation)
- Move closer or farther – Drag the anchor toward or away from the camera to adjust the mounting angle
As you adjust the FOV, a side view simulation/graph appears in the camera settings sidebar on the right, showing how the FOV looks from the side perspective.
You can also change the mounting angle directly in the camera settings sidebar under the settings for each channel.
Adjusting zoom (varifocal cameras)
For varifocal cameras (cameras with zoom capability), two additional anchors appear at the ends of the FOV. Manipulating these anchors changes the focal length (zoom level).
- Drag the end anchors – Stretch or compress the FOV to adjust zoom
- Sidebar control – You can also change zoom in the camera settings sidebar under the Zoom section for each channel
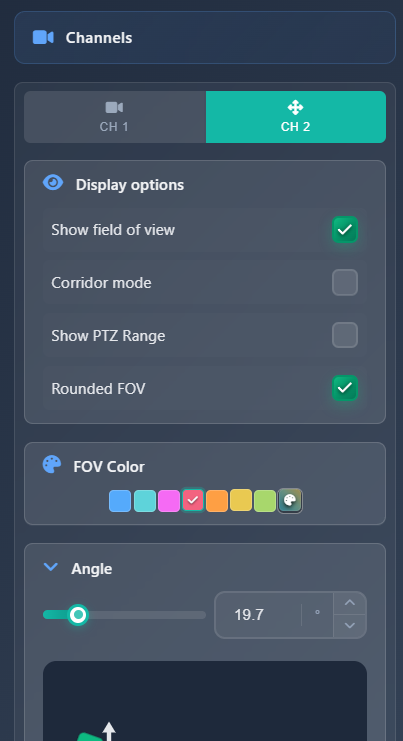
Channel FOV settings
In the settings for each channel, you can configure various FOV display and behavior options:
Basic FOV options
- Show field of view – Toggle to hide or show the FOV visualization
- Corridor mode – Switches horizontal and vertical FOV (as if the camera were rotated 90 degrees). Useful for long, narrow areas like hallways
- Show PTZ range – Only for PTZ cameras, displays the range of coverage the camera can achieve
- Rounded FOV – Forces rounded FOV display regardless of settings in FOV settings
Display range options
- Limit display range – If a camera's FOV extends very far, you can limit the display range so it doesn't clutter your entire project view
- Analytics range – Enable to show a line on the FOV at a defined distance with a selected icon. This helps visualize the effective range for features like motion detection or license plate recognition
- Direction Arrow – Enable to show an additional arrow on the FOV indicating the camera's viewing direction
Keyboard shortcuts for FOV adjustment
When a camera is selected, you can fine-tune its FOV directly from the keyboard without using the mouse anchors.
| Shortcut | Action |
|---|---|
Ctrl + ← / → | Rotate FOV left / right (±0.5°) |
Ctrl + ↑ / ↓ | Decrease / increase mounting angle (±0.5°) |
+ / - | Zoom in / out (±0.2%, varifocal cameras only) |
Tab | Cycle through channels (multi-channel cameras) |
Note: Arrow keys without
Ctrlstill move the camera position as usual.
For multi-channel cameras, pressTabfirst to select the channel you want to adjust, then use the shortcuts above. The active channel is shown in a tooltip.
Tips
- Use the side view simulation in the sidebar to better understand how mounting angle affects coverage
- Enable analytics range to visualize effective detection distances for motion detection or license plate recognition
- Use corridor mode for long, narrow areas to better represent camera coverage
- Limit display range for cameras with very long FOV to keep your project view clean and readable
- The direction arrow helps clarify camera orientation, especially when working with multiple cameras
- Adjust zoom using the end anchors for varifocal cameras to fine-tune coverage area