Creating Project
Creating a project is the first step in designing your low-voltage system. Every project requires a background layout that serves as the foundation for your design. You can create a new project using satellite maps, upload your own files, start with a blank background, or open an existing project.
When to use this
- When starting a new CCTV or low-voltage system design from scratch
- When you need to create a project based on a specific location using satellite map views
- When you have existing floor plans, PDFs, or DXF files that you want to use as project backgrounds
- When you want to open and continue working on a previously saved project
- When you need to organize and manage multiple projects using tags and workspaces
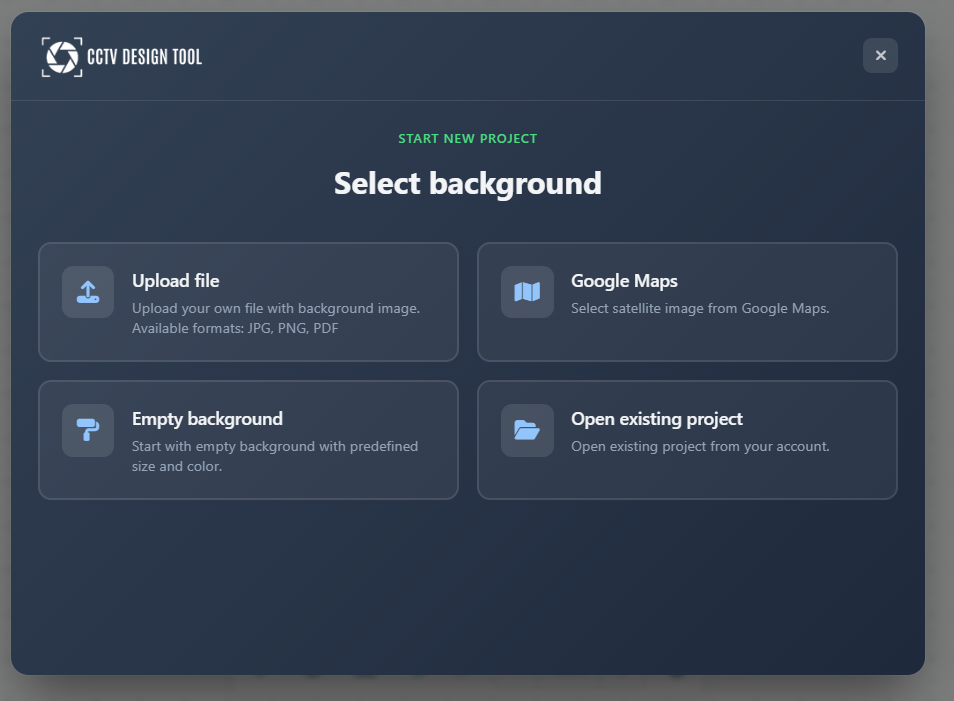
Opening the project dialog
To create a new project or open an existing one, click on the Project menu in the left toolbar and select New Project. A modal will appear with options to create a new project or open an existing one.
Creating a project with Maps
The application allows you to use satellite imagery as your project background using Mapbox or ArcGIS providers. This is ideal when you need to design a system for a specific location.
Finding the location
You can find the location using one of these methods:
- Use your device's current location
- Enter an address manually
- Use What3Words coordinates
Configuring the map
After finding the location, a satellite view appears. You can:
- Select Map Provider: Choose between Mapbox and ArcGIS to get the best imagery for your area.
- Load Building Walls: Check the "Load building walls" option to automatically import building outlines as walls in your project.
Select Area
A selection rectangle appears on the map. This rectangle defines the specific area that will be imported into your project.
- Move: Drag the center of the rectangle to position it over your desired location.
- Resize: Drag the corners or edges of the rectangle to adjust the size of the area you want to capture.
Zoom and pan the map as needed to locate your site, then adjust the green selection rectangle to cover the exact area you need for your design.
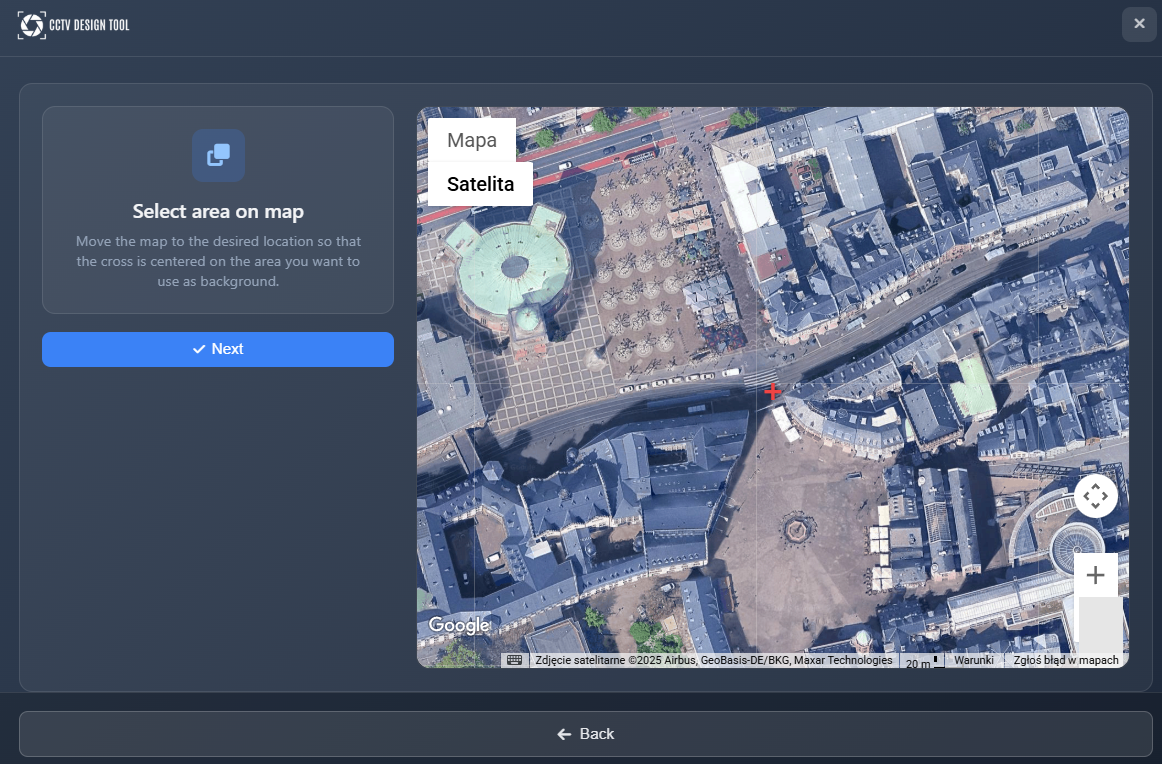
Once you have selected the area, click Next to generate the map image and proceed.
Creating a project from uploaded files
You can upload your own files to use as project backgrounds, including image files, PDFs, or DXF files.
File selection
Choose an image file, PDF, or DXF file from your device. The application will process the file based on its type.
PDF files
If you upload a PDF file, you'll need to select which page from the PDF you want to use as the background. The application will display thumbnails of all available pages for you to choose from.
DXF files
For DXF files, you'll need to select which layers you want to use. All lines on the selected layers will be converted to walls in your project. Carefully select which layers to import, as this affects your project structure.
Image files
Image files don't require any additional selection step and can be used directly as backgrounds.
Creating a blank project
A blank project creates an empty canvas with a solid color background. This option is useful for conceptual designs or when you don't have a specific layout to work with. Simply select "Blank Background" from the project creation options.
Setting image scale
For projects created from uploaded files, you need to set the image scale to ensure accurate measurements and realistic FOV calculations.
Drag the visible measurement line over a known dimension on your image and enter its actual value in the input field. This establishes the image scale, ensuring that all generated FOV (Field of View) areas and connection lengths are realistic and accurate.
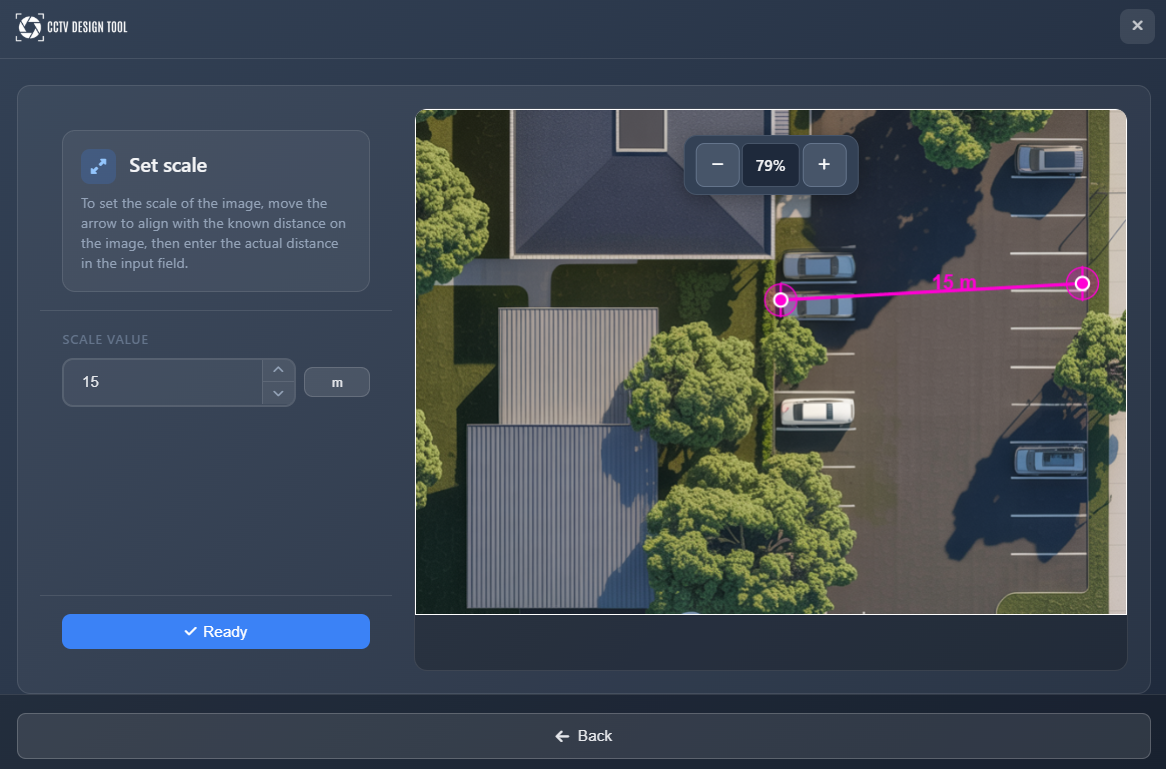
Always set the image scale accurately using a known dimension – this is crucial for realistic system design.
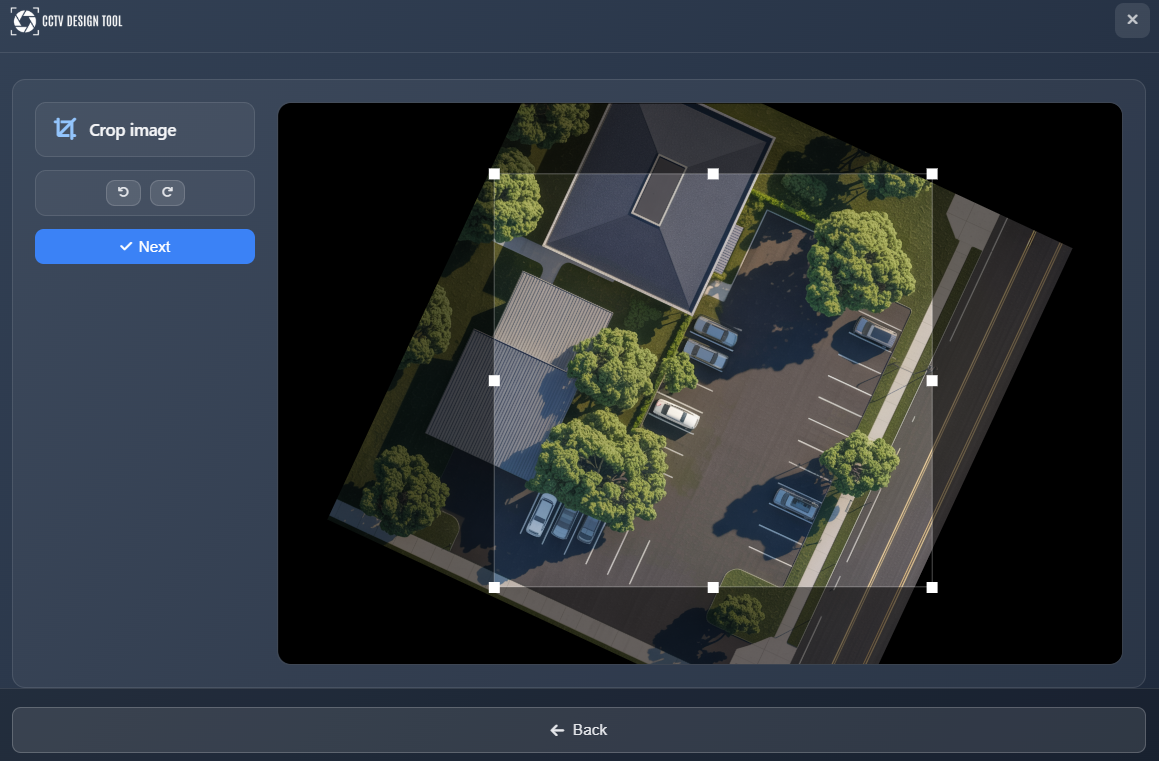
Adjusting background image
After setting the scale, you can adjust your background image to better suit your design needs.
Cropping and rotation
You can crop the image to adjust the visible area and rotate it to align it properly with your design needs. Use the crop handles to adjust the visible area and the rotation controls to orient the image correctly.
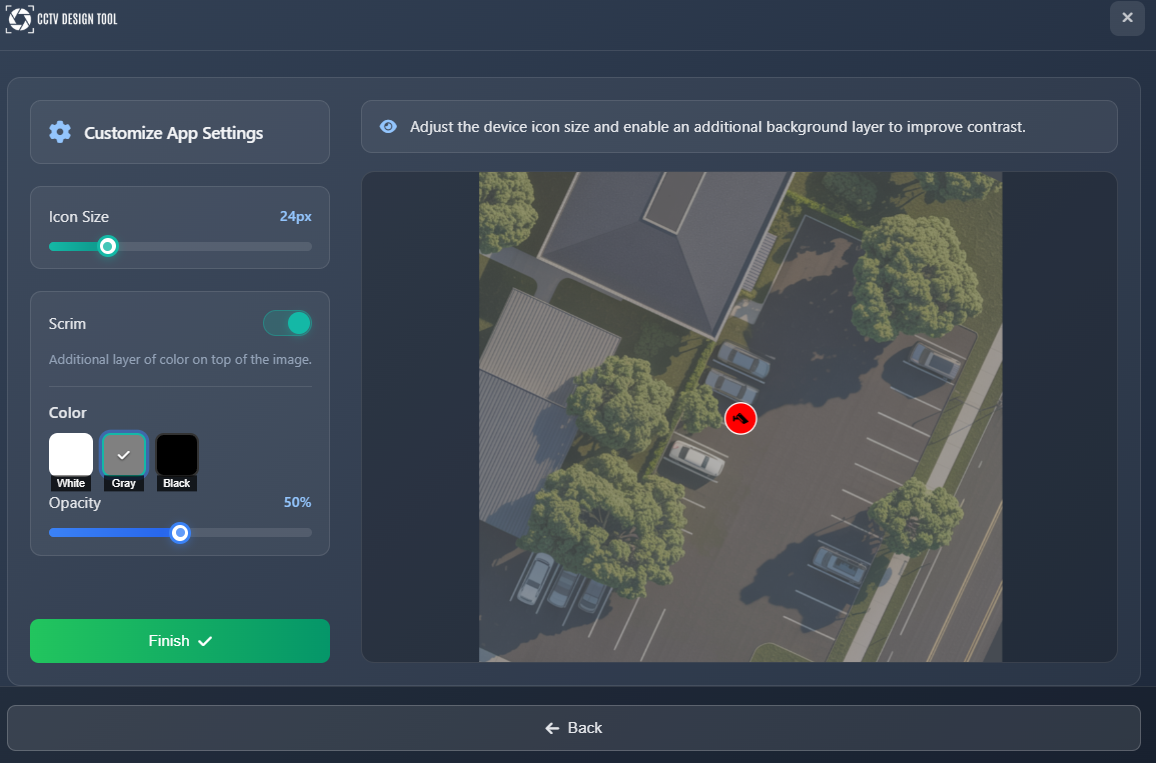
Customize app settings
Before finalizing your project, you can customize app settings:
- Symbol sizes – Adjust the size of symbols in your project to ensure they are visible. You can change this later in App Settings
- Color overlay – Add a color overlay layer to darken or brighten the background image, improving contrast for the elements you'll be adding to the project
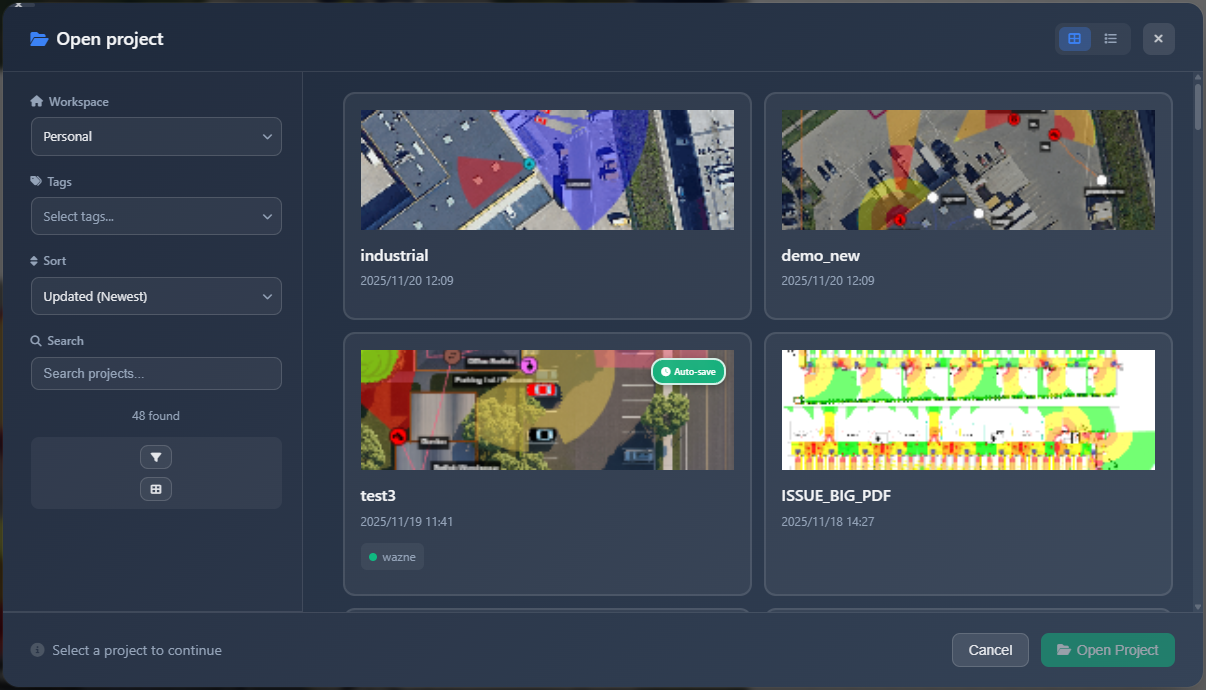
Opening existing projects
To open a previously saved project, select New Project from the Project menu (or Open Project if available). The project browser will display your saved projects.
Filtering projects
Use the filters on the left sidebar to find your project:
- Workspace – Select a workspace to filter projects (available only for Enterprise users)
- Tags – Filter projects by tags. Projects can be tagged to group and organize them
- Filename – Search for projects by filename
Project list
Each project in the list displays:
- Thumbnail – Visual preview of the project
- Tags – Associated tags for organization
- Auto-save flag – Indicates if the project has been auto-saved and the auto-save is newer than the manual save
Project actions
When you select a project, the following actions become available at the bottom:
- Rename – Change the project name
- Assign Tag – Add or modify tags for the project
- Delete – Remove the project permanently
- Open Project – Load the project into the application
Click Open Project to load the selected project and begin working on it.
Storage modes
When saving a project for the first time (or via Project → Save As), you choose how it is stored:
| Mode | Description |
|---|---|
| Cloud | Project is saved to the CCTV Design Tool cloud. Images are uploaded to secure storage. This is the default for most users. |
| Cloud + Encryption (Zero Knowledge) | Project data and images are encrypted in the browser before upload. The server never receives or stores your encryption key — only you can open the project. Requires setting a password. |
| Local file | Project is saved as a .cctvp file on your device. No cloud upload occurs. Works offline. |
TIP
Enterprise administrators can enforce a specific storage mode for all team members via Encryption Policy in Enterprise Settings.
Cloud + Encryption (Zero Knowledge) mode
When you choose Cloud + Encryption, you are prompted to set a password. This password is used to derive an encryption key entirely within your browser. Neither the password nor the key is ever sent to the server.
Important:
- Write down your password and store it securely. There is no password recovery — if you lose it, the project cannot be opened.
- If your Enterprise admin has set a company-wide encryption password, you will be asked to enter that password instead of creating your own.
- To change the storage mode of an existing project, use Project → Save As and select a different mode.
For a detailed guide on Zero Knowledge encryption, see Zero Knowledge Encryption.
Tips
- Always set the image scale accurately using a known dimension – this ensures realistic FOV calculations and connection lengths
- Use tags to organize your projects, especially when working on multiple client projects
- For DXF files, carefully select which layers to import, as all lines on those layers become walls
- Adjust the color overlay if your background image is too bright or dark, making it easier to see the elements you add
- The auto-save flag helps you identify which projects have been automatically saved more recently than manual saves
- When using satellite maps, zoom in close enough to see building details clearly before centering the crosshair