Camera Sidebar
The Camera Sidebar appears automatically when you select a camera in your project. It provides comprehensive settings and configuration options organized into multiple tabs: Settings, Network, Appearance, Accessories, and Photos. This sidebar is your primary tool for configuring camera properties, FOV settings, network configuration, and visual appearance.
When to use this
- When you need to configure camera settings and properties after adding a camera to your project
- When you want to adjust FOV (Field of View) settings for individual camera channels
- When you need to set IP addresses and network configuration for cameras
- When you want to customize camera appearance, icons, and display names
- When you need to add accessories or upload installation photos for cameras
Settings tab
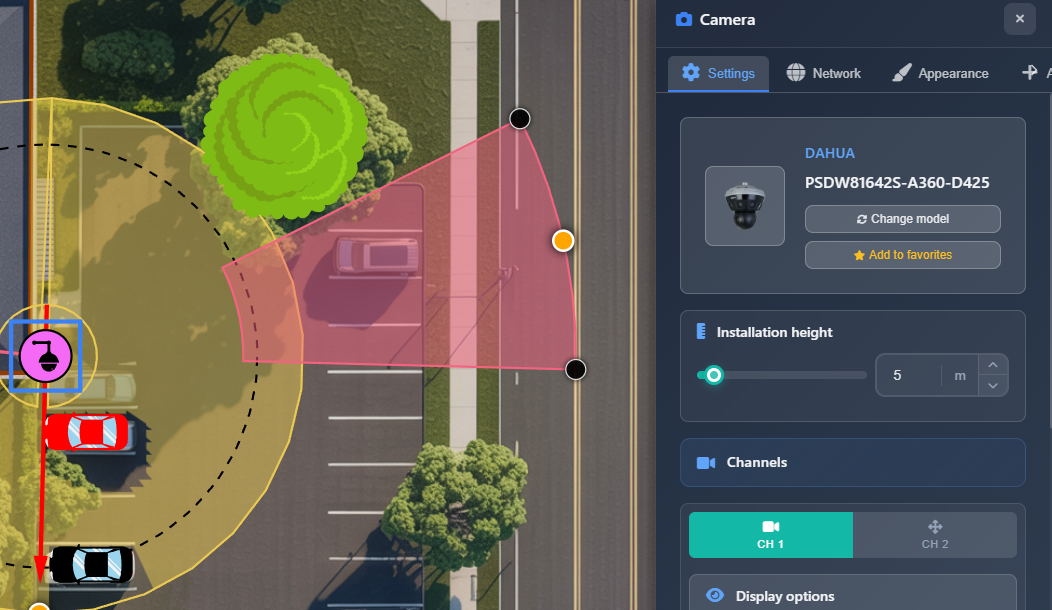
The Settings tab contains the most important camera configuration options, including camera selection, installation height, and detailed channel settings.
Selected camera
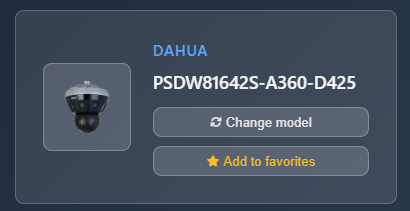
The top section displays information about the currently selected camera:
- Camera image – Visual representation of the camera model
- Manufacturer and model – Shows the manufacturer and model name of the selected camera
- Change model button – Allows you to replace the camera with a different model from the catalog or favorites
- Add to favorites button – Adds the camera to your favorites list for quick access from the left sidebar Favorites menu
TIP
If you need to change the model of multiple cameras at once, use the Tools > Batch Change function instead of changing them individually.
Installation height
The installation height setting determines how high the camera is mounted, which directly affects FOV modeling and calculations. Adjust this value using the slider or input field. The height is measured in your project's units (meters or feet) and influences how the camera's field of view is calculated and displayed.
Channels
The Channels section displays settings for all camera channels. Each channel can be configured independently with its own FOV settings.
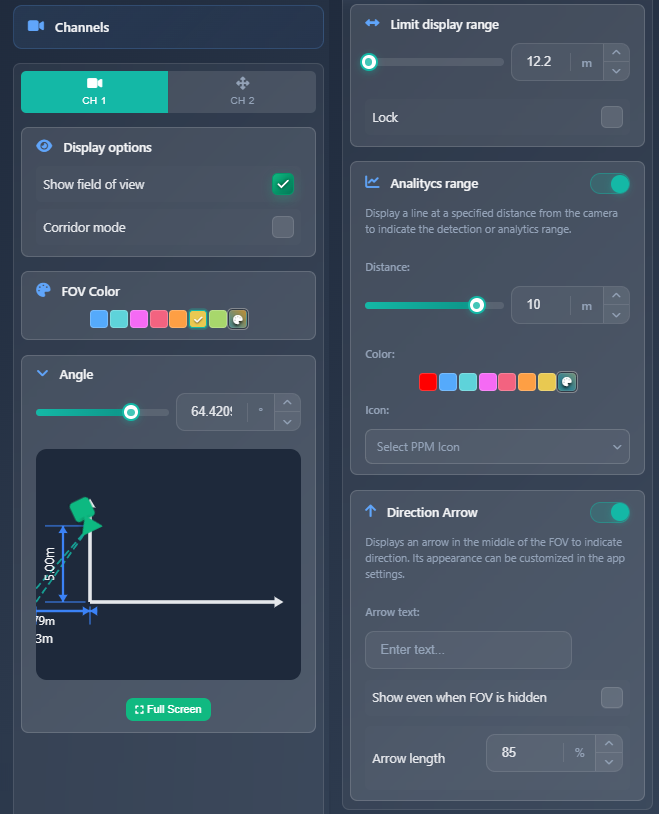
Display options
- Show field of view – Toggle to show or hide the FOV visualization for this specific channel
- Corridor mode – Switches horizontal and vertical FOV (as if the camera were rotated 90 degrees). Useful for long, narrow areas like hallways
- Show PTZ range – Only available for PTZ cameras. Visualizes the PTZ coverage range
- Rounded FOV – Forces rounded FOV display regardless of settings in App Settings
FOV color
You can select a custom color for the generated FOV. This option is only active when the Layers > Show DORI option is disabled. When DORI zones are enabled, the FOV displays DORI zone colors instead of the custom color.
Angle
The Angle section allows you to set the camera's viewing/mounting angle with a visual graph showing where the FOV starts and ends. You can adjust the angle using the slider or input field, and the graph provides a side view visualization. You can also manipulate this directly using the FOV anchors on the canvas by moving them closer to or farther from the camera.
A full-screen button is available to open a larger view of the angle calculation.
Display range
When a camera's FOV extends very far, it can clutter or darken the plan view. The Display Range option allows you to limit how far the FOV is displayed on the plan. You can set the maximum range and use the Lock checkbox to prevent manual FOV manipulation from changing this setting.
Analytics range
The Analytics Range feature displays an additional line on the FOV at a specified distance with a selected icon. This helps visualize the effective range for features like motion detection or license plate recognition. You can configure:
- Distance – Set the distance from the camera where the analytics line appears
- Color – Choose the line color
- Icon – Select an icon to display (car, human, or none)
Additional settings for this line (such as line style and thickness) are available in App Settings.
Direction arrow
The Direction Arrow displays an additional arrow on the FOV showing the camera's viewing direction. You can configure:
- Arrow text – Text that appears next to the arrow
- Show even when FOV is hidden – Checkbox to display the arrow even when FOV is hidden
- Arrow length – Adjust the length of the arrow as a percentage
Additional arrow settings (color and thickness) are available in App Settings.
Zoom
For varifocal cameras (cameras with zoom capability), a Zoom section appears. You can adjust the zoom level using the slider, which changes the focal length. The current focal length in millimeters is displayed in the section header.
Network tab
The Network tab contains network configuration settings for the camera.
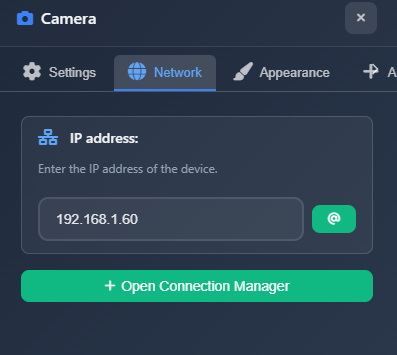
IP address
Set the camera's IP address in the input field. Next to the input field, there's an "@" icon button that automatically assigns the next available IP address from your network configuration. This helps prevent IP conflicts and speeds up configuration.
A button is also available to open the Connection Manager, which allows you to manage connections and network settings for multiple devices at once.
Appearance tab
The Appearance tab controls how the camera is displayed on your plan and in reports.
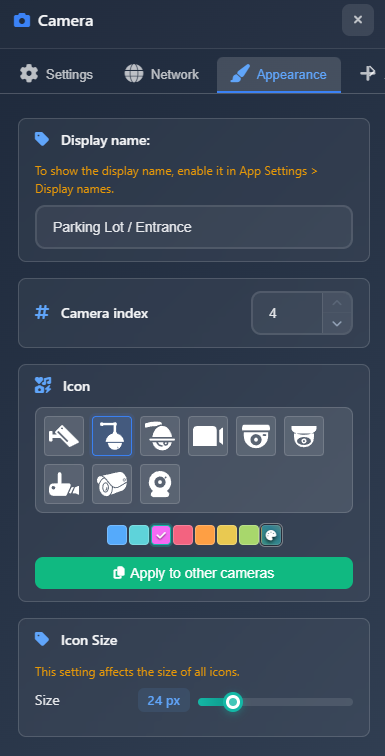
Display name
The Display Name is the camera name shown on the plan when the App Settings > Display Names option is enabled. This name is also used in lists and reports, making it important for documentation and project organization.
Camera index
The Camera Index is the number that appears on the plan when App Settings > Show Index is enabled. Instead of camera icons, numbers are displayed, making it easy to reference specific cameras when discussing the plan. You can adjust the camera's position in the index, which reorders cameras in the project.
Icon
Configure the camera's icon and color. You can choose from various icon types and set a custom color. An "Apply to other cameras" button allows you to apply the same icon and color settings to all other cameras in the project.
Icon size
Adjust the size of device symbols on the plan.
WARNING
This setting affects the size of all devices (cameras and network devices), not just the selected camera.
Accessories tab
The Accessories tab allows you to add accessories from the catalog, such as mounting brackets, to your camera.
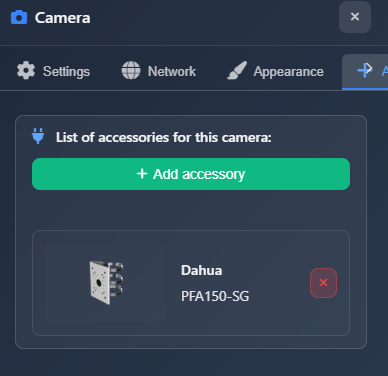
Click Add Accessory to open a search dialog with filters pre-configured to find accessories compatible with your camera model. The search filters by manufacturer and model compatibility.
WARNING
Not all accessories are mapped in the database. If you can't find an accessory using the filters, you can remove the filters and search by name instead.
Once added, accessories appear in a list showing the manufacturer, model, and image. You can remove accessories by clicking the delete button on each item.
Photos tab
The Photos tab allows you to upload photos related to the camera installation:
- Photo before – Upload a photo of the installation location before mounting the camera
- Photo after – Upload a photo of the installation location after mounting the camera
- NVR view – Upload a screenshot from the NVR showing the actual camera view
These photos can be included in reports and documentation to provide visual context for the installation.
Tips
- Use the Change Model feature to quickly swap camera models while preserving position and other settings
- Add frequently used cameras to favorites for quick access when adding new cameras
- Adjust installation height accurately as it significantly affects FOV calculations
- Use the Lock checkbox in Display Range to prevent accidental changes when manually adjusting FOV
- Enable Analytics Range to visualize effective detection distances for motion detection or license plate recognition
- Use Camera Index to create a numbering system that makes it easy to reference cameras in discussions
- The Direction Arrow helps clarify camera orientation, especially useful when FOV is hidden
- If you can't find an accessory with filters, try searching without filters by name
- Upload installation photos to provide visual documentation in your reports